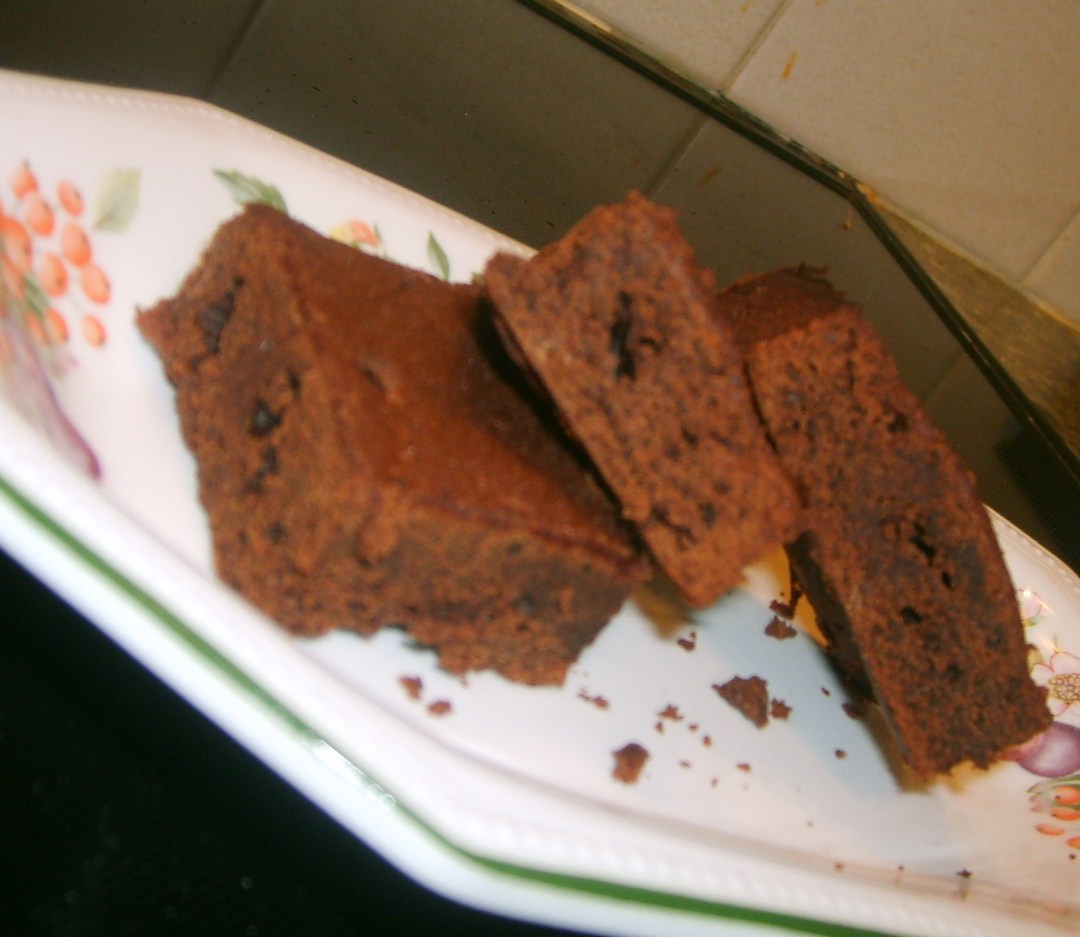
Here are some shots of the cake I made this week for my nephew's 3rd birthday party. He loves the cartoon Peppa Pig, particularly George Pig who never goes anywhere without his toy dinosaur. The inside is chocolate brownie cake and it went down well with the sugar-high kids at the party. I loved making this cake, it was a lot of fun. After we cut the cake I glimpsed my nephew gnawing on one of George Pig's eyeballs and he looked delighted. Success!
One woman's passion for culinary adventures and tasty treats. Oh, and cheese. Lots of cheese.
Showing posts with label dessert. Show all posts
Monday 5 July 2010
George Pig birthday cake
Happy birthday!

Here are some shots of the cake I made this week for my nephew's 3rd birthday party. He loves the cartoon Peppa Pig, particularly George Pig who never goes anywhere without his toy dinosaur. The inside is chocolate brownie cake and it went down well with the sugar-high kids at the party. I loved making this cake, it was a lot of fun. After we cut the cake I glimpsed my nephew gnawing on one of George Pig's eyeballs and he looked delighted. Success!


Here are some shots of the cake I made this week for my nephew's 3rd birthday party. He loves the cartoon Peppa Pig, particularly George Pig who never goes anywhere without his toy dinosaur. The inside is chocolate brownie cake and it went down well with the sugar-high kids at the party. I loved making this cake, it was a lot of fun. After we cut the cake I glimpsed my nephew gnawing on one of George Pig's eyeballs and he looked delighted. Success!
Tuesday 1 June 2010
Pistachio cake
A fragrant and unusual cake that is both incredibly moist and light.

I asked Martin what sort of cake he'd like for his birthday this year; he made the rather unusual request of a pistachio sponge. I had never heard of such a thing but figured I'd have a go. The result was an amazingly moist cake with loads of subtle, beautiful flavours. The cardamom and orange zest really bring this to life. We served with some whipped cream and big grins. All measurements here are in American cups (I would recommend investing in these, they are cheap and incredibly useful), but if you don't have a set then just use a teacup.
Ingredients:
- 3/4 cup unsalted shelled pistachios
- 1 cup flour
- 2 teaspoons baking powder
- 1 teaspoon ground cardamom (if grinding yourself then remove the green husks and pop out the little black seeds)
- Pinch salt
- 1/2 cup milk
- 1 vanilla pod
- 4 oz butter, softened
- 1 cup sugar
- 3 large eggs
- Zest of 3 oranges
Method:
- Preheat the oven to 160 (fan oven) or 180 for conventional.
- Generously grease a 9-inch round cake pan and set aside.
- Put the shelled pistachios into a food processor and pulse until finely ground. Be careful not to overprocess or they will become a paste.
- Put the ground pistachios into a bowl and mix together with the flour, baking powder, cardamom, and salt.
- Remove the seeds from the vanilla pod and add them to the bowl.
- In a separate bowl, beat together the softened butter and sugar until pale in colour and fluffy in texture; this will take a few minutes.
- Add the eggs one at the time, beating well after each one.
- Put the mixer on low and add a tablespoon of the pistachio mixture, then half of the milk. Add half of the remaining pistachio mix, followed by the rest of the milk, then the rest of the pistachio mix until just combined.
- Turn off the mixture and using a spatula gently fold in the orange rind.
- Pour the batter (it will be very wet and loose) into the baking tin and bake for 20 - 25 minutes until a skewer comes out clean from the centre and the edges of the cake pull away from the sides of the tin.
- Cool in the tin for 10 mins before turning out to cool fully on a wire rack.
- Serve at room temperature (putting it in the fridge will dry it out a lot) with cream or ice-cream.
I asked Martin what sort of cake he'd like for his birthday this year; he made the rather unusual request of a pistachio sponge. I had never heard of such a thing but figured I'd have a go. The result was an amazingly moist cake with loads of subtle, beautiful flavours. The cardamom and orange zest really bring this to life. We served with some whipped cream and big grins. All measurements here are in American cups (I would recommend investing in these, they are cheap and incredibly useful), but if you don't have a set then just use a teacup.
Ingredients:
- 3/4 cup unsalted shelled pistachios
- 1 cup flour
- 2 teaspoons baking powder
- 1 teaspoon ground cardamom (if grinding yourself then remove the green husks and pop out the little black seeds)
- Pinch salt
- 1/2 cup milk
- 1 vanilla pod
- 4 oz butter, softened
- 1 cup sugar
- 3 large eggs
- Zest of 3 oranges
Method:
- Preheat the oven to 160 (fan oven) or 180 for conventional.
- Generously grease a 9-inch round cake pan and set aside.
- Put the shelled pistachios into a food processor and pulse until finely ground. Be careful not to overprocess or they will become a paste.
- Put the ground pistachios into a bowl and mix together with the flour, baking powder, cardamom, and salt.
- Remove the seeds from the vanilla pod and add them to the bowl.
- In a separate bowl, beat together the softened butter and sugar until pale in colour and fluffy in texture; this will take a few minutes.
- Add the eggs one at the time, beating well after each one.
- Put the mixer on low and add a tablespoon of the pistachio mixture, then half of the milk. Add half of the remaining pistachio mix, followed by the rest of the milk, then the rest of the pistachio mix until just combined.
- Turn off the mixture and using a spatula gently fold in the orange rind.
- Pour the batter (it will be very wet and loose) into the baking tin and bake for 20 - 25 minutes until a skewer comes out clean from the centre and the edges of the cake pull away from the sides of the tin.
- Cool in the tin for 10 mins before turning out to cool fully on a wire rack.
- Serve at room temperature (putting it in the fridge will dry it out a lot) with cream or ice-cream.
Wednesday 19 May 2010
Lemon vanilla shortbread
Buttery, crumbley deliciousness

Dinner was over. Tea was in hand. But something was missing; I wanted something sweet. I also wanted something quick and that didn't require a visit to the shops. Shortbread was the answer. Prep and cook time together it took less than 20 minutes to go from ingredients to in-my-face. Yum!
Ingredients:
- 4oz butter, softened
- 2oz sugar
- 6oz plain flour
- Zest of 1 lemon
- Seeds of 1 vanilla pod or 1 tsp vanilla extract
Method:
- Heat the oven to 160 degrees (fan oven) or 180 (conventional).
- Beat together the soft butter and sugar until smooth.
- Add the lemon zest and vanilla and mix until incorporated.
- Stir in the flour and work it into a dough. Shape it into a thick disc and transfer to a lined baking tray.
- Press the dough gently to flatten it into a circle approx 1/2 inch thick; you can use a rolling pin for this if you want but it's easier to use your hands.
- Use the back of a fork to mark indents around the edge of the disc and prick some holes with the fork prongs - this is faffing really, so skip this if you're not fussed prettying up the shortbread.
- Bake in the oven for 10 - 15 minutes until it is starting to go golden brown around the edges.
- Cut into segments while it is still hot and transfer to a wire rack to cool.
Dinner was over. Tea was in hand. But something was missing; I wanted something sweet. I also wanted something quick and that didn't require a visit to the shops. Shortbread was the answer. Prep and cook time together it took less than 20 minutes to go from ingredients to in-my-face. Yum!
Ingredients:
- 4oz butter, softened
- 2oz sugar
- 6oz plain flour
- Zest of 1 lemon
- Seeds of 1 vanilla pod or 1 tsp vanilla extract
Method:
- Heat the oven to 160 degrees (fan oven) or 180 (conventional).
- Beat together the soft butter and sugar until smooth.
- Add the lemon zest and vanilla and mix until incorporated.
- Stir in the flour and work it into a dough. Shape it into a thick disc and transfer to a lined baking tray.
- Press the dough gently to flatten it into a circle approx 1/2 inch thick; you can use a rolling pin for this if you want but it's easier to use your hands.
- Use the back of a fork to mark indents around the edge of the disc and prick some holes with the fork prongs - this is faffing really, so skip this if you're not fussed prettying up the shortbread.
- Bake in the oven for 10 - 15 minutes until it is starting to go golden brown around the edges.
- Cut into segments while it is still hot and transfer to a wire rack to cool.
Friday 23 April 2010
Happy birthday, Dad!
Monday 22 March 2010
Apple & blueberry cake
A lovely moist, sweet cake for afternoon tea

I got a fantastic cookbook from the Good Housekeeping range with a beautiful array of sweet recipes to try. This is my first baking effort from the book and it turned out wonderfully; the cake was almost better the next day rather than going stale. Be warned that the dough takes quite a bit of work to pack around the fruit as it is frightfully sticky, but keep flouring your hands as you work and it gets a lot easier.
Ingredients:
- 4 oz butter, chilled and diced
- 8 oz self-raising flour, sifted
- 1/2 tsp salt
- 6 oz granulated sugar
- 2 large eggs, beaten
- 2 Granny Smith apples, peeled, cored and sliced
- A punnet of blueberries
Method:
- Preheat the oven to 160 degrees (fan oven), then line and grease an 8 inch baking tin.
- Put the flour and salt in a large mixing bowl, add the diced butter and rub it into the flour until the mixture resembles fine breadcrumbs.
- Add 4.5 oz of the sugar with the beaten eggs and stir well until it comes together into a sticky dough.
- Using well-floured hands, take half the mixture and press it into the base of the baking tin.
- Layer the sliced apples and blueberries evenly over the surface, setting aside a few blueberries for the top of the cake.
- Sprinkle the fruit layer with the remaining 1.5 oz sugar then press the remaining dough (again with well-floured hands) over the top.
- Add the remaining blueberries and push them down slightly into the cake.
- Bake for 40 minutes until the cake has risen and is firm to the touch; a skewer should come out clean.
- Cool in the tin for 10 minutes before turning out onto a wire rack.
I got a fantastic cookbook from the Good Housekeeping range with a beautiful array of sweet recipes to try. This is my first baking effort from the book and it turned out wonderfully; the cake was almost better the next day rather than going stale. Be warned that the dough takes quite a bit of work to pack around the fruit as it is frightfully sticky, but keep flouring your hands as you work and it gets a lot easier.
Ingredients:
- 4 oz butter, chilled and diced
- 8 oz self-raising flour, sifted
- 1/2 tsp salt
- 6 oz granulated sugar
- 2 large eggs, beaten
- 2 Granny Smith apples, peeled, cored and sliced
- A punnet of blueberries
Method:
- Preheat the oven to 160 degrees (fan oven), then line and grease an 8 inch baking tin.
- Put the flour and salt in a large mixing bowl, add the diced butter and rub it into the flour until the mixture resembles fine breadcrumbs.
- Add 4.5 oz of the sugar with the beaten eggs and stir well until it comes together into a sticky dough.
- Using well-floured hands, take half the mixture and press it into the base of the baking tin.
- Layer the sliced apples and blueberries evenly over the surface, setting aside a few blueberries for the top of the cake.
- Sprinkle the fruit layer with the remaining 1.5 oz sugar then press the remaining dough (again with well-floured hands) over the top.
- Add the remaining blueberries and push them down slightly into the cake.
- Bake for 40 minutes until the cake has risen and is firm to the touch; a skewer should come out clean.
- Cool in the tin for 10 minutes before turning out onto a wire rack.
Sunday 3 January 2010
Flourless chocolate cake
Chocolatey, rich, achingly good cake

My lovely friends Frank & Mary were kind enough to host a New Year's Eve party, so I thought it would be nice to bring along a big fat chocolate cake as my contribution. This is an incredibly decadent cake, which is somewhat truffle-like in the middle and incredibly moist. It takes a little longer to make than a traditional chocolate cake but it's absolutely worth it. Thanks Jimjim for snapping a picture before it got scoffed.
Ingredients:
- 10.5 oz good quality dark chocolate
- 5 oz margarine
- 6 eggs
- 2 oz caster sugar
Method:
- Preheat the oven to 160 degrees (fan oven). Grease a 20cm round cake tin really well and line the bottom of it with greaseproof paper.
- Break up the chocolate and melt it with the butter.
- Beat the egg yolks with 2 tablespoons of the sugar with an electric beater until pale in colour and bigger in volume. Mix this in to the cooled melted chocolate.
- Whisk the egg whites until they have soft peaks and add in the remaining sugar.
- Using a metal spoon or a spatula, gently fold one-third of the egg whites into the chocolate mixture until combined. Add the rest of the whites and mix gently so as not to deflate the mixture.
- Pour the mixture into the cake tin and bake for 20 minutes, until the top of the cake is slightly firm to the touch and is starting to crack slightly. Don't bother sticking a skewer in to check if it's done as you would with a regular cake, as the inside of this badboy will still be slightly gooey and fudgy.
- Leave to cool for a few minutes in the tin and then turn out onto a wire rack. The cake will sink slightly but don't worry, this is normal.
- When cooled, dust with a generous teaspoon of icing sugar and cut into big lovely fattening slices. It would be really really good served with a dollop of thick whipped cream and an Irish coffee.

My lovely friends Frank & Mary were kind enough to host a New Year's Eve party, so I thought it would be nice to bring along a big fat chocolate cake as my contribution. This is an incredibly decadent cake, which is somewhat truffle-like in the middle and incredibly moist. It takes a little longer to make than a traditional chocolate cake but it's absolutely worth it. Thanks Jimjim for snapping a picture before it got scoffed.
Ingredients:
- 10.5 oz good quality dark chocolate
- 5 oz margarine
- 6 eggs
- 2 oz caster sugar
Method:
- Preheat the oven to 160 degrees (fan oven). Grease a 20cm round cake tin really well and line the bottom of it with greaseproof paper.
- Break up the chocolate and melt it with the butter.
- Beat the egg yolks with 2 tablespoons of the sugar with an electric beater until pale in colour and bigger in volume. Mix this in to the cooled melted chocolate.
- Whisk the egg whites until they have soft peaks and add in the remaining sugar.
- Using a metal spoon or a spatula, gently fold one-third of the egg whites into the chocolate mixture until combined. Add the rest of the whites and mix gently so as not to deflate the mixture.
- Pour the mixture into the cake tin and bake for 20 minutes, until the top of the cake is slightly firm to the touch and is starting to crack slightly. Don't bother sticking a skewer in to check if it's done as you would with a regular cake, as the inside of this badboy will still be slightly gooey and fudgy.
- Leave to cool for a few minutes in the tin and then turn out onto a wire rack. The cake will sink slightly but don't worry, this is normal.
- When cooled, dust with a generous teaspoon of icing sugar and cut into big lovely fattening slices. It would be really really good served with a dollop of thick whipped cream and an Irish coffee.
Sunday 6 December 2009
Chocolate orange cake
Moist citrus sponge with lovely dark chocolate chunks

It was my niece's birthday recently, and she couldn't celebrate properly as she was suffering a nasty bout of flu. I thought she definitely deserved a decadent treat, and what better way to say 'sorry your birthday was shit' than to bring her a lovely big delicious cake? I used a sort of bundt-style cake tin for this, but you could also just split the batter between two circular sponge tins and then sandwich them together with some cream or ganache to make a more conventional two-tiered cake.
Ingredients:
- 8 oz butter
- 7 oz sugar
- 5 eggs
- zest of 3 oranges
- 7.5 oz flour
- 1/2 tsp baking powder
- 1/2 tsp bread soda
- 125 ml freshly squeezed orange juice
- 6 fluid oz buttermilk
- 2 tsp vanilla extract (not essence)
- Bar of dark chocolate, preferably 70% cocoa
For the syrup:
- 250 ml orange juice
- 1.5 oz sugar
Method:
- Using an electric beater (you really need one for this recipe, unless you have the patience of a saint and the arm muscles of a professional lifter man... that's a profession, right?), cream together the butter and sugar in a bowl until it is pale in colour (about 5 minutes). Add the eggs, one at the time, and chuck in the orange zest. If it looks a bit curdled, don't worry, it won't last.
- In a bowl, sieve together the flour, baking powder and bread soda.
- In another bowl, mix together the orange juice, buttermilk and vanilla extract.
- Turn on the electric beater again and add 1/3 of the flour mixture into the creamed butter, then add 1/2 the buttermilk mixture. Still mixing all the time, add half of the remaining flour, then all of the buttermilk, then the remainder of the flour.
- Chop up the chocolate into rough chunks and coat them in a handful of flour; this is to stop them all sinking to the bottom of the cake as it bakes.
- Turn off the electric beater and fold in the chocolate chunks with a spatula.
- Pour the batter (it will be quite wet for a sponge batter) into a well-greased tin (or two tins, if using round cake tins) and smooth the top with the spatula.
- Bake in a low-moderate oven (160 celcius for a fan oven) for 30 - 35 minutes until the top of the cake is slightly springy and a skewer comes out clean.
- Let it cool for a few minutes while you prepare the syrup.
- In a small saucepan, combine the sugar and orange juice and heat gently until the sugar melts and is completely dissolved.
- Turn out the cake from the tin (gently!) and slowly spoon the syrup over the cake while it is still warm. The syrup will be absorbed by the sponge to give the most incredibly moist and melty sponge.
- Leave to cool entirely and serve with a glass of wine or a nice coffee.

It was my niece's birthday recently, and she couldn't celebrate properly as she was suffering a nasty bout of flu. I thought she definitely deserved a decadent treat, and what better way to say 'sorry your birthday was shit' than to bring her a lovely big delicious cake? I used a sort of bundt-style cake tin for this, but you could also just split the batter between two circular sponge tins and then sandwich them together with some cream or ganache to make a more conventional two-tiered cake.
Ingredients:
- 8 oz butter
- 7 oz sugar
- 5 eggs
- zest of 3 oranges
- 7.5 oz flour
- 1/2 tsp baking powder
- 1/2 tsp bread soda
- 125 ml freshly squeezed orange juice
- 6 fluid oz buttermilk
- 2 tsp vanilla extract (not essence)
- Bar of dark chocolate, preferably 70% cocoa
For the syrup:
- 250 ml orange juice
- 1.5 oz sugar
Method:
- Using an electric beater (you really need one for this recipe, unless you have the patience of a saint and the arm muscles of a professional lifter man... that's a profession, right?), cream together the butter and sugar in a bowl until it is pale in colour (about 5 minutes). Add the eggs, one at the time, and chuck in the orange zest. If it looks a bit curdled, don't worry, it won't last.
- In a bowl, sieve together the flour, baking powder and bread soda.
- In another bowl, mix together the orange juice, buttermilk and vanilla extract.
- Turn on the electric beater again and add 1/3 of the flour mixture into the creamed butter, then add 1/2 the buttermilk mixture. Still mixing all the time, add half of the remaining flour, then all of the buttermilk, then the remainder of the flour.
- Chop up the chocolate into rough chunks and coat them in a handful of flour; this is to stop them all sinking to the bottom of the cake as it bakes.
- Turn off the electric beater and fold in the chocolate chunks with a spatula.
- Pour the batter (it will be quite wet for a sponge batter) into a well-greased tin (or two tins, if using round cake tins) and smooth the top with the spatula.
- Bake in a low-moderate oven (160 celcius for a fan oven) for 30 - 35 minutes until the top of the cake is slightly springy and a skewer comes out clean.
- Let it cool for a few minutes while you prepare the syrup.
- In a small saucepan, combine the sugar and orange juice and heat gently until the sugar melts and is completely dissolved.
- Turn out the cake from the tin (gently!) and slowly spoon the syrup over the cake while it is still warm. The syrup will be absorbed by the sponge to give the most incredibly moist and melty sponge.
- Leave to cool entirely and serve with a glass of wine or a nice coffee.
Tuesday 24 November 2009
Chocolate brownies
Heavy, rich, velvety chocolate brownies for a wicked indulgence

Sorry for the rubbish photo, my camera is in a sulk today. Anyway, these brownies are fantastic. They are so good that I made two batches in two days due to demand. They take about 5 minutes to prepare and 15 minutes to bake so they are officially the quickest thing I have ever baked from start to finish. My brother also assures me that they are the tastiest thing I have ever baked. Double win!
Ingredients:
5 oz margarine
2 eggs
8 oz caster sugar
3.5 oz flour
2 oz cocoa powder
1 tsp vanilla extract
2 heaped tsp instant coffee
Method:
Chop up the margarine, chuck it in a big bowl and put it in the microwave until it melts. Once it's all smooth and liquid, mix in the cocoa powder, and then the sugar.
Dissolve the coffee in a tiny bit of hot water (just enough water so that the granules dissolve properly) and add this to the mix along with the vanilla extract. Add the eggs, one at the time, then mix in the flour.
Pour into a baking tin and bake at 160 celcius (fan oven) for approximately 15 minutes. The cooking time will vary according to your oven and also how thick your brownies are by virtue of your baking tin. There are really 3 ways to check if they are done (and these rules apply to all baked sponges really). Firstly, put a skewer into the centre of the brownies - if it comes out gooey, they're not done yet. If it comes out almost clean, they are done. Second, touch the top of the brownies with your finger; if the sponge springs back until your touch, it's cooked. Finally, look at the edges of the sponge - if it's starting to pull away from the sides of the baking tray, it's ready to come out of the oven.
Leave to cool, cut into squares, and distribute amongst people whom you wish to impress.
Sorry for the rubbish photo, my camera is in a sulk today. Anyway, these brownies are fantastic. They are so good that I made two batches in two days due to demand. They take about 5 minutes to prepare and 15 minutes to bake so they are officially the quickest thing I have ever baked from start to finish. My brother also assures me that they are the tastiest thing I have ever baked. Double win!
Ingredients:
5 oz margarine
2 eggs
8 oz caster sugar
3.5 oz flour
2 oz cocoa powder
1 tsp vanilla extract
2 heaped tsp instant coffee
Method:
Chop up the margarine, chuck it in a big bowl and put it in the microwave until it melts. Once it's all smooth and liquid, mix in the cocoa powder, and then the sugar.
Dissolve the coffee in a tiny bit of hot water (just enough water so that the granules dissolve properly) and add this to the mix along with the vanilla extract. Add the eggs, one at the time, then mix in the flour.
Pour into a baking tin and bake at 160 celcius (fan oven) for approximately 15 minutes. The cooking time will vary according to your oven and also how thick your brownies are by virtue of your baking tin. There are really 3 ways to check if they are done (and these rules apply to all baked sponges really). Firstly, put a skewer into the centre of the brownies - if it comes out gooey, they're not done yet. If it comes out almost clean, they are done. Second, touch the top of the brownies with your finger; if the sponge springs back until your touch, it's cooked. Finally, look at the edges of the sponge - if it's starting to pull away from the sides of the baking tray, it's ready to come out of the oven.
Leave to cool, cut into squares, and distribute amongst people whom you wish to impress.
Monday 16 November 2009
Raspberry and white chocolate trifle
Sweet boozey birthday trifle, personalised with crushed chocolate lettering.

Ingredients:
For the sponge:
- 3 eggs
- 3oz caster sugar
- 3 oz plain flour, sieved
For the custard:
- 1 pint full-fat milk
- 55ml cream
- 1 tsp vanilla extract
- 4 egg yolks
- 1oz caster sugar
- 2 level tsp cornflour
- 1 big bar of white chocolate, chopped
- 1 packet of fresh raspberries
- Raspberry jam
- Bristol cream sherry
- Whipped cream
Method:
- To make the sponge, preheat the oven to 160 degrees celcius (that's for a fan oven - try 180 if using a conventional oven).
- Whisk the egg yolks and sugar together with an electric beater until thick and pale. Fold in the flour gently using a metal spoon.
- Pour into a greased baking tin and bake for 10 - 15 minutes; it is cooked when it is golden and springy to the touch.
- When the sponge has cooled completely, cut it in half through the middle. Place one half in the bottom of your trifle bowl and douse liberally with sherry. Spread the other piece of sponge thickly with raspberry jam, and place it in the dish on top of the previous layer. Again, douse with sherry.
- Place the fresh raspberries on top of the sponge, evenly spacing them.
- Next order of business is to make the custard. You can absolutely cheat and use custard from a packet if you want to; the trifle will still taste amazing, but if you have the time and the gumption it is a real treat to have homemade custard.
- Pour the milk and cream into a saucepan, add the vanilla extract, and bring to a simmer slowly over a low heat.
- Meanwhile, mix together the egg yolks, sugar and conflour with an electric beater until really well blended.
- Pour the milk and cream mixture into the eggs and sugar. Be sure to whisk nonstop at this stage.
- Pour the mixture back into the saucepan and stir it gently over a low heat until it thickens. Add the white chocolate and stir until melted.
- Spoon the custard evenly over the raspberries and sponge and allow to cool.
- Finally, spoon a layer of whipped cream on top of the custard and the trifle is complete.
- We served with some sweet dessert wine, and as you can see the trifle didn't last too long:

Afterwards, a bit of a catnap was in order. See what I did there? Catnap? I'll get my coat.
sp
Ingredients:
For the sponge:
- 3 eggs
- 3oz caster sugar
- 3 oz plain flour, sieved
For the custard:
- 1 pint full-fat milk
- 55ml cream
- 1 tsp vanilla extract
- 4 egg yolks
- 1oz caster sugar
- 2 level tsp cornflour
- 1 big bar of white chocolate, chopped
- 1 packet of fresh raspberries
- Raspberry jam
- Bristol cream sherry
- Whipped cream
Method:
- To make the sponge, preheat the oven to 160 degrees celcius (that's for a fan oven - try 180 if using a conventional oven).
- Whisk the egg yolks and sugar together with an electric beater until thick and pale. Fold in the flour gently using a metal spoon.
- Pour into a greased baking tin and bake for 10 - 15 minutes; it is cooked when it is golden and springy to the touch.
- When the sponge has cooled completely, cut it in half through the middle. Place one half in the bottom of your trifle bowl and douse liberally with sherry. Spread the other piece of sponge thickly with raspberry jam, and place it in the dish on top of the previous layer. Again, douse with sherry.
- Place the fresh raspberries on top of the sponge, evenly spacing them.
- Next order of business is to make the custard. You can absolutely cheat and use custard from a packet if you want to; the trifle will still taste amazing, but if you have the time and the gumption it is a real treat to have homemade custard.
- Pour the milk and cream into a saucepan, add the vanilla extract, and bring to a simmer slowly over a low heat.
- Meanwhile, mix together the egg yolks, sugar and conflour with an electric beater until really well blended.
- Pour the milk and cream mixture into the eggs and sugar. Be sure to whisk nonstop at this stage.
- Pour the mixture back into the saucepan and stir it gently over a low heat until it thickens. Add the white chocolate and stir until melted.
- Spoon the custard evenly over the raspberries and sponge and allow to cool.
- Finally, spoon a layer of whipped cream on top of the custard and the trifle is complete.
- We served with some sweet dessert wine, and as you can see the trifle didn't last too long:
Afterwards, a bit of a catnap was in order. See what I did there? Catnap? I'll get my coat.
sp
Baileys coffee
My favourite after-dinner drink.

I don't drink coffee very often, but I do love a creamy boozey coffee after a special meal. These beauties are easy to make once you know what you're doing, and they look impressive when serving to guests.
Ingredients:
- Good quality coffee
- Baileys (even better, get the cheaper equivalent in Tesco or Aldi for 7 euro a bottle)
- Sugar
- Cream, whipped
Method:
- Brew the coffee; make it quite strong so that the flavour is able to come through the Baileys and the cream.
- Pour a generous shot of Baileys into each coffee glass, add 1 spoon of sugar and top up with coffee. Stir really well to make sure the sugar is dissolved.
- Pour some boiling water into a mug and get yourself a metal spoon, preferably a soup spoon if you have one. Dip the spoon into the hot water and then get a spoonful of whipped cream. Allow the cream to slide gently off the hot spoon on to the side of the coffee glass; this way the cream won't sink and you will have a perfect layer of cream at the top.
- Sprinkle with cocoa powder or coffee granules and serve.
I don't drink coffee very often, but I do love a creamy boozey coffee after a special meal. These beauties are easy to make once you know what you're doing, and they look impressive when serving to guests.
Ingredients:
- Good quality coffee
- Baileys (even better, get the cheaper equivalent in Tesco or Aldi for 7 euro a bottle)
- Sugar
- Cream, whipped
Method:
- Brew the coffee; make it quite strong so that the flavour is able to come through the Baileys and the cream.
- Pour a generous shot of Baileys into each coffee glass, add 1 spoon of sugar and top up with coffee. Stir really well to make sure the sugar is dissolved.
- Pour some boiling water into a mug and get yourself a metal spoon, preferably a soup spoon if you have one. Dip the spoon into the hot water and then get a spoonful of whipped cream. Allow the cream to slide gently off the hot spoon on to the side of the coffee glass; this way the cream won't sink and you will have a perfect layer of cream at the top.
- Sprinkle with cocoa powder or coffee granules and serve.
Tiramisu
Creamy, moist and rich without being too heavy; the perfect dessert.

Martin and I served this as our dessert at our Come Dine With Me party. It is easy to make, and also simple to present in a beautiful way as you can make it in individual ramekins and keep everything neat very easily.I decorated the top of each dessert with the first letter of each guest's name to make it personalised. I think I just wanted an excuse to cut up bits of cardboard and play around with cocoa powder for a while; it was fun!
Ingredients (makes 8 small tiramisus):
- 1 packet of lady fingers, or some plain sponge if you can't get the fingers
- Coffee, the best you can lay your mitts on
- Dark rum/ brandy/ baileys
- 3 egg yolks
- 1.25 oz caster sugarr
- 1 or 2 teaspoons vanilla extract (don't use vanilla essence, it's awful)
- 250g marscapone cheese
- 250ml double cream, lightly whipped
- cocoa powder for decoration
Method:
- Make some strong coffee and spike it with booze - dark rum or brandy is good; I had neither so I put in a splash of baileys and it worked really well. Dip the sponge fingers into the coffee and put a layer of wet gooey sponge at the bottom of each ramekin.
- Using an electric mixer (if you don't have one this stage will take a long time), mix together the egg yolks and the caster sugar for at least 10 minutes. The mixture will begin quite thin and yellow but get paler and thicker until it is almost white and double its volume.
- Add in the vanilla extract, marscapone and double cream and mix well.
- Spoon half of this creamy mixture over the first layer of sponge fingers.
- Make another layer of sponge fingers dipped in coffee in each ramekin, and top with the remaining cream mixture.
- To personalise your desserts for a dinner party, cut out some letters from cardboard and lay them on top of your tiramisus. Using a sieve, sprinkle cocoa powder over the top of the tiramisu from a height, and remove the cardboard to reveal your pretty lettering on top of the dessert.


- Place the tiramisu in the fridge to chill, preferably overnight. I served with baileys coffees.
Martin and I served this as our dessert at our Come Dine With Me party. It is easy to make, and also simple to present in a beautiful way as you can make it in individual ramekins and keep everything neat very easily.I decorated the top of each dessert with the first letter of each guest's name to make it personalised. I think I just wanted an excuse to cut up bits of cardboard and play around with cocoa powder for a while; it was fun!
Ingredients (makes 8 small tiramisus):
- 1 packet of lady fingers, or some plain sponge if you can't get the fingers
- Coffee, the best you can lay your mitts on
- Dark rum/ brandy/ baileys
- 3 egg yolks
- 1.25 oz caster sugarr
- 1 or 2 teaspoons vanilla extract (don't use vanilla essence, it's awful)
- 250g marscapone cheese
- 250ml double cream, lightly whipped
- cocoa powder for decoration
Method:
- Make some strong coffee and spike it with booze - dark rum or brandy is good; I had neither so I put in a splash of baileys and it worked really well. Dip the sponge fingers into the coffee and put a layer of wet gooey sponge at the bottom of each ramekin.
- Using an electric mixer (if you don't have one this stage will take a long time), mix together the egg yolks and the caster sugar for at least 10 minutes. The mixture will begin quite thin and yellow but get paler and thicker until it is almost white and double its volume.
- Add in the vanilla extract, marscapone and double cream and mix well.
- Spoon half of this creamy mixture over the first layer of sponge fingers.
- Make another layer of sponge fingers dipped in coffee in each ramekin, and top with the remaining cream mixture.
- To personalise your desserts for a dinner party, cut out some letters from cardboard and lay them on top of your tiramisus. Using a sieve, sprinkle cocoa powder over the top of the tiramisu from a height, and remove the cardboard to reveal your pretty lettering on top of the dessert.
- Place the tiramisu in the fridge to chill, preferably overnight. I served with baileys coffees.
Thursday 23 July 2009
Vanilla bean cheesecake with a mixed berry coulis
Warning: This makes battered Mars Bars look like salad.

My older brother Derek lives in England and is home this week for a rare but delightful visit. To celebrate, we all milled down to my sister's house in Wicklow and got pissed as farts and played board games. I figured we would need something suitably impressive and indulgent to bring to the party. Derek used to be the pastry chef in a prestigious local restaurant and managed to vaguely recall their recipe for their famed cheesecake. We very successfully recreated it in our kitchen, complete with hangovers and tea. Bear in mind that the measurements are approximated, but it's hard to go wrong with this recipe. Keep tasting as you go and you'll be grand.
This is the Derek!

Ingredients:
For the base:
1 packet Digestive biscuits
4 oz butter, melted
For the topping:
500g philadelphia cheese
250ml double cream
3 tablespoons caster sugar (approx)
1 vanilla pod
Juice of 1/2 a lemon
For the coulis:
Mixed berries
Granulated sugar
Method:
Make the base first by crushing the Digestive biscuits into crumbs. Combine this with the melted butter and mix well to ensure all of the biscuits are coated in the liquid. Chuck this mixture into the base of a cheesecake tin and press it down well with the back of a spoon to make sure it is properly compacted and will set. Pop this in the fridge whilst you get on with making the filling.
Using an electric mixer, whisk up the double cream until really thick (but before it becomes butter). Add the cream cheese and mix well.
Slice the vanilla pod open lengthways and use the flat part of your knife to remove all the delicious innards, which look like tiny black particles. You can substitute vanilla extract if you don't have pods, but I wouldn't use vanilla essence as it's really rubbish. (Side note: Vanilla pods are famously expensive, but needn't break the bank. I buy mine from a website called Vanilla Mart where you can get a good load of pods for about 5 British pounds. Vanilla extract is also available in Tescos for about 6 euros a bottle.) Throw this into the mix. Add in approx 3 tablespoons of caster sugar and the juice of 1/2 lemon and mix well. Taste the mixture at this point and add more sugar and/or lemon if needed. Try to avoid eating the entire bowl of goo at this stage, which is ridiculously hard to do.
Spoon the filling over the chilled biscuit base and smooth it with a spatula. It should be thick and creamy and flecked with lovely black spots of vanilla. Mine looked something like this in the tin:

This is a very heavy, thick cheesecake so you can leave it to set for anywhere between 1 hour and 1 day before serving. The taste is of a very rich, decadent dessert and it can be enlivened by serving with a simple coulis. To make this, get some mixed berries (I get lovely bags of mixed frozen fruit in Aldi for about 2 euro a go - if you can't get this, just get some fresh fruit from your local supplier). If using frozen berries like me, put them in a bowl and let them defrost slowly overnight. Put them in a saucepan with smattering of sugar and cook them on a low low heat for about 20 minutes. Beware not to leave a wooden spoon in the mix as they cook, as mine is now permanently stained purple from the juices.

When the berries have released all their juices and the liquid has thickened slightly, turn off the heat and allow to cool. Don't reduce the liquid too much as it will continue to thicken as it cools.
Serve slices of the cheesecake with a generous splash of coulis on the side, preferably with a nice Pinot Grigio or a can of the finest, cheapest beer you have to hand.
My older brother Derek lives in England and is home this week for a rare but delightful visit. To celebrate, we all milled down to my sister's house in Wicklow and got pissed as farts and played board games. I figured we would need something suitably impressive and indulgent to bring to the party. Derek used to be the pastry chef in a prestigious local restaurant and managed to vaguely recall their recipe for their famed cheesecake. We very successfully recreated it in our kitchen, complete with hangovers and tea. Bear in mind that the measurements are approximated, but it's hard to go wrong with this recipe. Keep tasting as you go and you'll be grand.
This is the Derek!
Ingredients:
For the base:
1 packet Digestive biscuits
4 oz butter, melted
For the topping:
500g philadelphia cheese
250ml double cream
3 tablespoons caster sugar (approx)
1 vanilla pod
Juice of 1/2 a lemon
For the coulis:
Mixed berries
Granulated sugar
Method:
Make the base first by crushing the Digestive biscuits into crumbs. Combine this with the melted butter and mix well to ensure all of the biscuits are coated in the liquid. Chuck this mixture into the base of a cheesecake tin and press it down well with the back of a spoon to make sure it is properly compacted and will set. Pop this in the fridge whilst you get on with making the filling.
Using an electric mixer, whisk up the double cream until really thick (but before it becomes butter). Add the cream cheese and mix well.
Slice the vanilla pod open lengthways and use the flat part of your knife to remove all the delicious innards, which look like tiny black particles. You can substitute vanilla extract if you don't have pods, but I wouldn't use vanilla essence as it's really rubbish. (Side note: Vanilla pods are famously expensive, but needn't break the bank. I buy mine from a website called Vanilla Mart where you can get a good load of pods for about 5 British pounds. Vanilla extract is also available in Tescos for about 6 euros a bottle.) Throw this into the mix. Add in approx 3 tablespoons of caster sugar and the juice of 1/2 lemon and mix well. Taste the mixture at this point and add more sugar and/or lemon if needed. Try to avoid eating the entire bowl of goo at this stage, which is ridiculously hard to do.
Spoon the filling over the chilled biscuit base and smooth it with a spatula. It should be thick and creamy and flecked with lovely black spots of vanilla. Mine looked something like this in the tin:
This is a very heavy, thick cheesecake so you can leave it to set for anywhere between 1 hour and 1 day before serving. The taste is of a very rich, decadent dessert and it can be enlivened by serving with a simple coulis. To make this, get some mixed berries (I get lovely bags of mixed frozen fruit in Aldi for about 2 euro a go - if you can't get this, just get some fresh fruit from your local supplier). If using frozen berries like me, put them in a bowl and let them defrost slowly overnight. Put them in a saucepan with smattering of sugar and cook them on a low low heat for about 20 minutes. Beware not to leave a wooden spoon in the mix as they cook, as mine is now permanently stained purple from the juices.
When the berries have released all their juices and the liquid has thickened slightly, turn off the heat and allow to cool. Don't reduce the liquid too much as it will continue to thicken as it cools.
Serve slices of the cheesecake with a generous splash of coulis on the side, preferably with a nice Pinot Grigio or a can of the finest, cheapest beer you have to hand.
Friday 26 June 2009
Crepes Suzette
The fancy name for "Pancakes in Orange Sauce"

This is a yummy dessert that I typically have just once a year, on Pancake Tuesday. My father is the master of this dish, and made it for me earlier this week as a treat. The sauce is rich and shiny and sweet and buttery and zingy all at once.
Ingredients:
For the pancakes:
3.5 oz flour
2 eggs
Pinch salt
200ml milk mixed with 75ml water (approx)
For the sauce:
2 oz butter
2 oz sugar
About 100 ml good quality orange juice (with bits in is even better)
Method:
For the pancakes, sieve the flour into a bowl and mix in the salt. Whisk in the eggs and gradually add in the milk/water mixture until you have the consistency you desire. I like my pancakes a little thicker than usual, so I tend not to mix in all of the liquid. Add as little or as much as you like really. For thin crepes, the mixture should be just slightly thicker than milk in consistency.
Cook the pancakes one at a time on a medium-hot frying pan, greased with a little oil or butter. Once cooked, fold each one in quarters and set aside.
The sauce ingredients as listed above as fairly approximate, as my father and I never work from a recipe for this dish but just go by eye and by taste. Taste the sauce as you go and add a little more sugar if its not sweet enough, or a little more butter if not rich enough.
To make the sauce, sprinkle the sugar over the bottom of a dry, large-bottomed shallow saucepan on a low heat. Allow the sugar to melt entirely and then add the butter. Mix together and the mixture will gain colour as the sugar caramelises.
Heat the orange juice gently in the microwave and add it to the sauce. Don't panic if some of the sugar crytallises into hard bits - these will melt as the sauce cooks. Once all the sugar is dissolved, let the tasting commence. For a zingier sauce, add the zest of an orange or even some Grand Marnier if your wallets can stretch to it.
Place some of the pancakes into the sauce, and have fun creating shapes like this:

Turn the pancakes a few times in the sauce and simmer for 2 or 3 minutes, until the pancakes are hot and hopelessly drowning in orange sauce. Serve immediately, and with gusto.
This is a yummy dessert that I typically have just once a year, on Pancake Tuesday. My father is the master of this dish, and made it for me earlier this week as a treat. The sauce is rich and shiny and sweet and buttery and zingy all at once.
Ingredients:
For the pancakes:
3.5 oz flour
2 eggs
Pinch salt
200ml milk mixed with 75ml water (approx)
For the sauce:
2 oz butter
2 oz sugar
About 100 ml good quality orange juice (with bits in is even better)
Method:
For the pancakes, sieve the flour into a bowl and mix in the salt. Whisk in the eggs and gradually add in the milk/water mixture until you have the consistency you desire. I like my pancakes a little thicker than usual, so I tend not to mix in all of the liquid. Add as little or as much as you like really. For thin crepes, the mixture should be just slightly thicker than milk in consistency.
Cook the pancakes one at a time on a medium-hot frying pan, greased with a little oil or butter. Once cooked, fold each one in quarters and set aside.
The sauce ingredients as listed above as fairly approximate, as my father and I never work from a recipe for this dish but just go by eye and by taste. Taste the sauce as you go and add a little more sugar if its not sweet enough, or a little more butter if not rich enough.
To make the sauce, sprinkle the sugar over the bottom of a dry, large-bottomed shallow saucepan on a low heat. Allow the sugar to melt entirely and then add the butter. Mix together and the mixture will gain colour as the sugar caramelises.
Heat the orange juice gently in the microwave and add it to the sauce. Don't panic if some of the sugar crytallises into hard bits - these will melt as the sauce cooks. Once all the sugar is dissolved, let the tasting commence. For a zingier sauce, add the zest of an orange or even some Grand Marnier if your wallets can stretch to it.
Place some of the pancakes into the sauce, and have fun creating shapes like this:
Turn the pancakes a few times in the sauce and simmer for 2 or 3 minutes, until the pancakes are hot and hopelessly drowning in orange sauce. Serve immediately, and with gusto.
Subscribe to:
Posts (Atom)